
Note: This post was originally published by Justin James on Medium. Justin is the founder of Let Your Nerd Be Heard, a Microsoft MVP, Angular lover, speaking coach & speaker specializing in making the complex simple and easy to understand.
In the DevOps world that we live in, we want everything to be automated including our UI tests. With Cypress, you get the automated the UI testing that we need. The next step is to have Cypress run as part of your automated builds to improve your build and deploy quality, increase your confidence in releasing to production and enable you to get your application into your users’ hands faster.
At a minimum you want your builds to run when you create a pull request and when the pull request is merged into the master branch. This allows you to ensure that all of your quality checks have been met and that your master branch is always in a deployable state. If you wanted you could also run a build on every pushed commit and branch which is the default for Travis CI.
To run our automated builds we are going to use the free version of Travis CI that is available to any public GitHub repository. Our build we will lint our code, create a production release, and execute our Cypress tests.
This article assumes that you have already added Cypress to your Angular project, created at least one Cypress test and the Cypress test successfully ran on your local development machine.
On our local development machine, we can use the Cypress UI to run our tests. This, however, doesn’t work on our build machine as the builds are run without user intervention in a headless mode and 100% from the command line.
Luckily for us, Cypress has a command line only mode that will run everything from the command line without opening up the Cypress UI by running Cypress using the cypress run command vs cypress open.
Dependencies
The first item of business is to figure out how to launch our Angular app so that Cypress can connect to it and run our UI test from the command line. On our development machine, we run ng serve but in a headless non-interactive environment that are two issues doing:
- There is no way to tell
ng serveto stop running when Cypress is done, so the build will never finish. - If you run
ng serve —-prodit deletes the production build that was just created and creates a new production build.
To solve the stopping of the web server without creating a new production build, we are going to use an npm package called start-server-and-test.
This package will call a command to start up the web server for our Angular app, monitor a URL for a response, kick off our tests once the web server is successfully started and then stop the web server when the tests are done running.
We need to install start-server-and-test as a development dependency on our Angular project.
Note: For all of the command line commands in this article they are to be run from the root of your Angular project.
Open a command line and run:
npm install --save-dev start-server-and-testInstead of using ng serve to serve our build output, we will use another npm package called angular-http-server.
We also need to install angular-http-server as a development dependency by running:
npm install --save-dev angular-http-serverServing Up Our Angular App
Now we are ready to add the npm script to start our web server using the angular-http-server package.
However, before we create the script, let's review the requirements we need to satisfy to serve up our Angular app with angular-http-server:
- We want the server to start in the dist/CypressCI folder which is the name of our Angular app in the demo project. This directory is automatically created when you run
ng build --prod. - We want to run the server on port 4200 so that we don’t have to change the Cypress configured URL
Now that we have our requirements, let’s create our script.
In the npm scripts section of our package.json, add the following script:
"ci:start-server": "angular-http-server --path ./dist/CypressCi -p 4200"
- — path is the directory location of our production build
- -p is the port to run the web server on
Testing Our Web Server Started
Let’s test theci:start-server script locally
- Stop
ng serveif you have it running by using ctrl+c - Open a command line and run
ng build --prodto create a production build in the dist folder - Run
npm run ci:start-serverto start up our web server - Open your browser and navigate to localhost:4200
- Your Angular app should be displayed
Running Cypress
Our next step is to create the npm script to run our Cypress tests
In the package.json npm scripts section add the following script to launch the command line version of Cypress:
"cy:run": "cypress run"
Testing Cypress Runs Successfully
Now let’s test that our cy:runscript runs successfully.
- Ensure that the
ci:start-serverscript from above is running - Open a new command line and execute our Cypress test by running:
npm run cy:run
3. You should have seen Cypress kicked off from the command line, successfully run all of your tests, and then be returned back to a command prompt.
4. You can close the second command line that you ran cy:run and stop the ci:start-server script using ctrl+c.
Start Web Server & Run Cypress
Now that we have the scripts that we need to start the web server and run our Cypress tests, let’s put the two together into a single command using the start-server-and-test dependency that we installed earlier.
In the npm scripts section of our package.json, add the following script called ci:cy-run that will call our ci:start-server, monitor localhost:4200, and run cy:run when localhost:4200 responds.
"ci:cy-run": "start-server-and-test ci:start-server http://localhost:4200 cy:run"
Testing Web Server & Run Cypress Script
Now from the command line we want to run our newly created script by running:
npm run ci:cy-runThis should have started the web server, waited for a response from localhost:4200, and then run our Cypress tests.
You can close this command line as we are done with it.
Travis CI Build Configuration
Now we are ready to create our Travis CI build configuration.
To configure Travis CI we need to create a .travis.yml file in the root of our Angular app that will tell Travis CI how to spin up a new build machine to install our npm dependencies, lint our code, create a production release of our Angular application, and run the scripts we created above
Node Setup
So that Travis CI can appropriately run our app, we need to make sure that it uses an image that has node installed by setting the language field to node_js.
language: node_js
Next, we need to tell Travis CI to use the Node LTS (Long Term Support) version by adding a node_js: section with a child field of-"lts/*". You could use any Node version but I personally like the stability that the LTS version provides us.
node_js:
  - "lts/*"
Install Dependencies
Our next step is to install our dependencies. In the past, we would have used npm install but starting with npm 6 there is a new command to use called npm ci.
According to the npm doc:
Thenpm ci command is similar to thenpm-install, except it’s meant to be used in automated environments or any situation where you want to make sure you’re doing a clean install of your dependencies. It can be significantly faster than a regular npm install by skipping certain user-oriented features. It is also more strict than a regular install, which can help catch errors or inconsistencies caused by the incrementally-installed local environments of most npm users.
To tell Travis CI to run npm ci we need to create an install: section that has a single command, npm ci.
install:
  - npm ci
Cache Dependencies
Now that we have the Node version set, we are going to add caching of our dependencies so that we don’t need to re-download unchanged dependencies on every build. However, we need to allow the npm ci and npm run cy:verify (we’ll create it shortly) commands to override the cache so that we download any updated dependencies that are listed in our package-lock.json.
Just like we defined the install section above we need to define a section called cache: that has a list of directories to cache and the commands that we want to allow you to override the cache:
cache:
  directories:
    - ~/.npm
    - ./node_modules
    - ~/.cache  override:
    - npm ci
    - npm run cy:verify
Angular Build Steps
Our last step for Travis CI is to run the Angular CLI commands to lint our code, create our production build, verify everything is setup right with Cypress and run our Cypress test.
As you may have already guessed, we need to create another section. The new section is called script: and it will contain the list of command to run
script:
  - ng lint
  - ng build --prod
  - npm run cy:verify
  - npm run ci:cy-run
Cypress Verify Script
The last step before we enable our build in Travis CI is to add the cypress verify script to our npm scripts. This command will ensure that Cypress is installed correctly and is executable so that if our build fails for a Cypress setup issue we know that is the root cause of the failure vs a test that is broken.
In the npm scripts section of our package.json, add the cy:verify script to run the cypress verify
"cy:verify": "cypress verify"
Now we are ready to enable our build in Travis CI.
Setting up GitHub Repository on Travis CI
We are using the free version of Travis CI available at https://travis-ci.orgthat is available to any GitHub public repository. Don’t confuse this with https://travis-ci.com that is the paid version for GitHub private repositories.
Note: You need to be an admin for any repository you want to setup in Travis CI
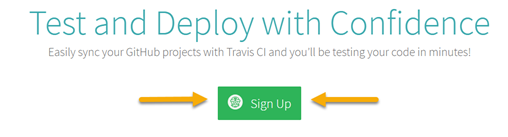
When you navigate to https://travis-ci.org you will need to log in with your GitHub credentials by clicking the “Sign Up” button
After you are logged in, you will need to enable your GitHub repositories in Travis CI so that Travis CI is able to monitor the repository for changes.
Click on your profile picture in the upper right to go to the settings page. Find your GitHub repository (cypress-ci in my case) that you want to enable in Travis CI and click the toggle to enable it.


Travis CI will now monitor your repository for changes to branches and pull requests and then kick off a build using the .travis.yml configuration that we created.
Running Travis CI Build
One gotcha that throws me off every time when I enable a GitHub repository in Travis CI is that until you push a new commit to your GitHub repository, Travis CI will sit there and wait. However, once you have run at least a build in Travis CI you can click on the “Restart build” to get it to re-run the a build.
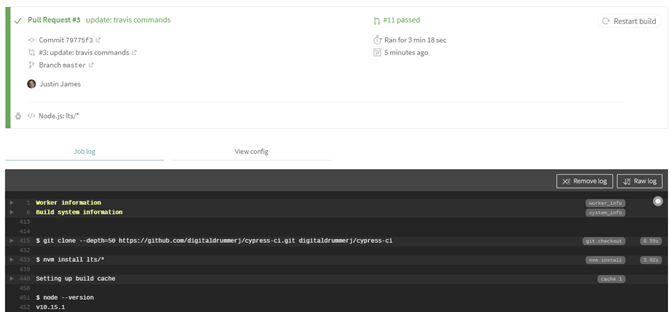
At this point, you need to push a commit to your GitHub repository on the branch that contains the .travis.yml file to kick off the build in Travis CI. It typically only takes a few seconds for Travis CI to detect that has commit has been pushed and then kick off the build for you.
If everything worked correctly, you will see a message that says the build passed along with the section turning green like in the image below.
Next Steps
You now have a successful build running in Travis CI that creates a production release and runs your Cypress UI tests. You are now ready to deploy the Angular release build to your hosting provider (Azure, GitHub Pages, AWS, Heroku, etc) which is outside the scope of this article as each hosting provider is different in how you deploy to them.
Conclusion
To recap, we added the npm dependencies and scripts needed to start up a web server to run your production build, run your Cypress UI tests, and then stop the web server. Then we created the Travis CI configuration needed to lint our code, create our production build, and run our Cypress tests.
Getting automated UI tests running as part of your DevOps pipeline is a critical step to increasing your build and deploy quality, feeling confident releasing at any time, and getting your application into your users’ hands faster.
Note: all of the commands that we ran as part of this article will work in any build environment that Node runs in and are not specific to Travis CI.
Go forth and automate all your UI tests!
Useful Links
- GitHub repository for article: https://github.com/digitaldrummerj/cypress-ci
- Subscribe to my blog at https://digitaldrummerj.me/
- Follow me on Twitter: https://twitter.com/digitaldrummerj (tech related) and https://twitter.com/nerdbeheard (public speaking related)
Thanks to Jayson Smith.