Earlier this year, we announced our biggest release of Cypress ever. This introduced a new unified UI, faster test runs, and support for a new type of testing, Component Tests. This initial release included Component Testing support for both React and Vue with the plan to add additional framework support over the next few months. Today, we are happy to deliver on that promise by adding first-class support for Component Testing for Angular!
Read on to learn more about:
- How Cypress Component Testing for Angular improves your testing experience with real-time browser rendering, intelligent feedback, and familiar ergonomics
- How we’ve streamlined the setup process for Component Testing by allowing users to scaffold spec files from your components (starting with Vue)
- How we’ve sped up your testing workflow by surfacing test flake insights from the Cypress Dashboard directly in the app
Why Component Test with Cypress?
Cypress Component Testing provides a testable component workbench for you to quickly build and test any Angular component regardless of its complexity.
Though you can unit test Angular components today using Karma or Jest, Cypress Component Testing provides several main advantages. Here’s why:
- The Cypress Test Runner is browser-based, which allows you to test-drive your component’s styles and API in an isolated way that you do not get with headless unit testing via a jsdom.
- Separating the components from the rest of your website enforces component-driven development, for developing higher quality, more durable UIs faster and more efficiently.
- Less code! That’s right, writing tests for your Angular components requires significantly less code and time than with Karma.
The Nuts & Bolts
One of the main differences between End-to-End and Component Testing is that unlike E2E testing, which relies on an existing server to serve your website that you visit, Component Testing relies on its own devServer to serve your Angular components. Once a server is established, we need a way to mount your Angular components to the DOM. Let’s take a look under the hood of these 2 main parts of Angular Component Testing.
Angular Dev Server
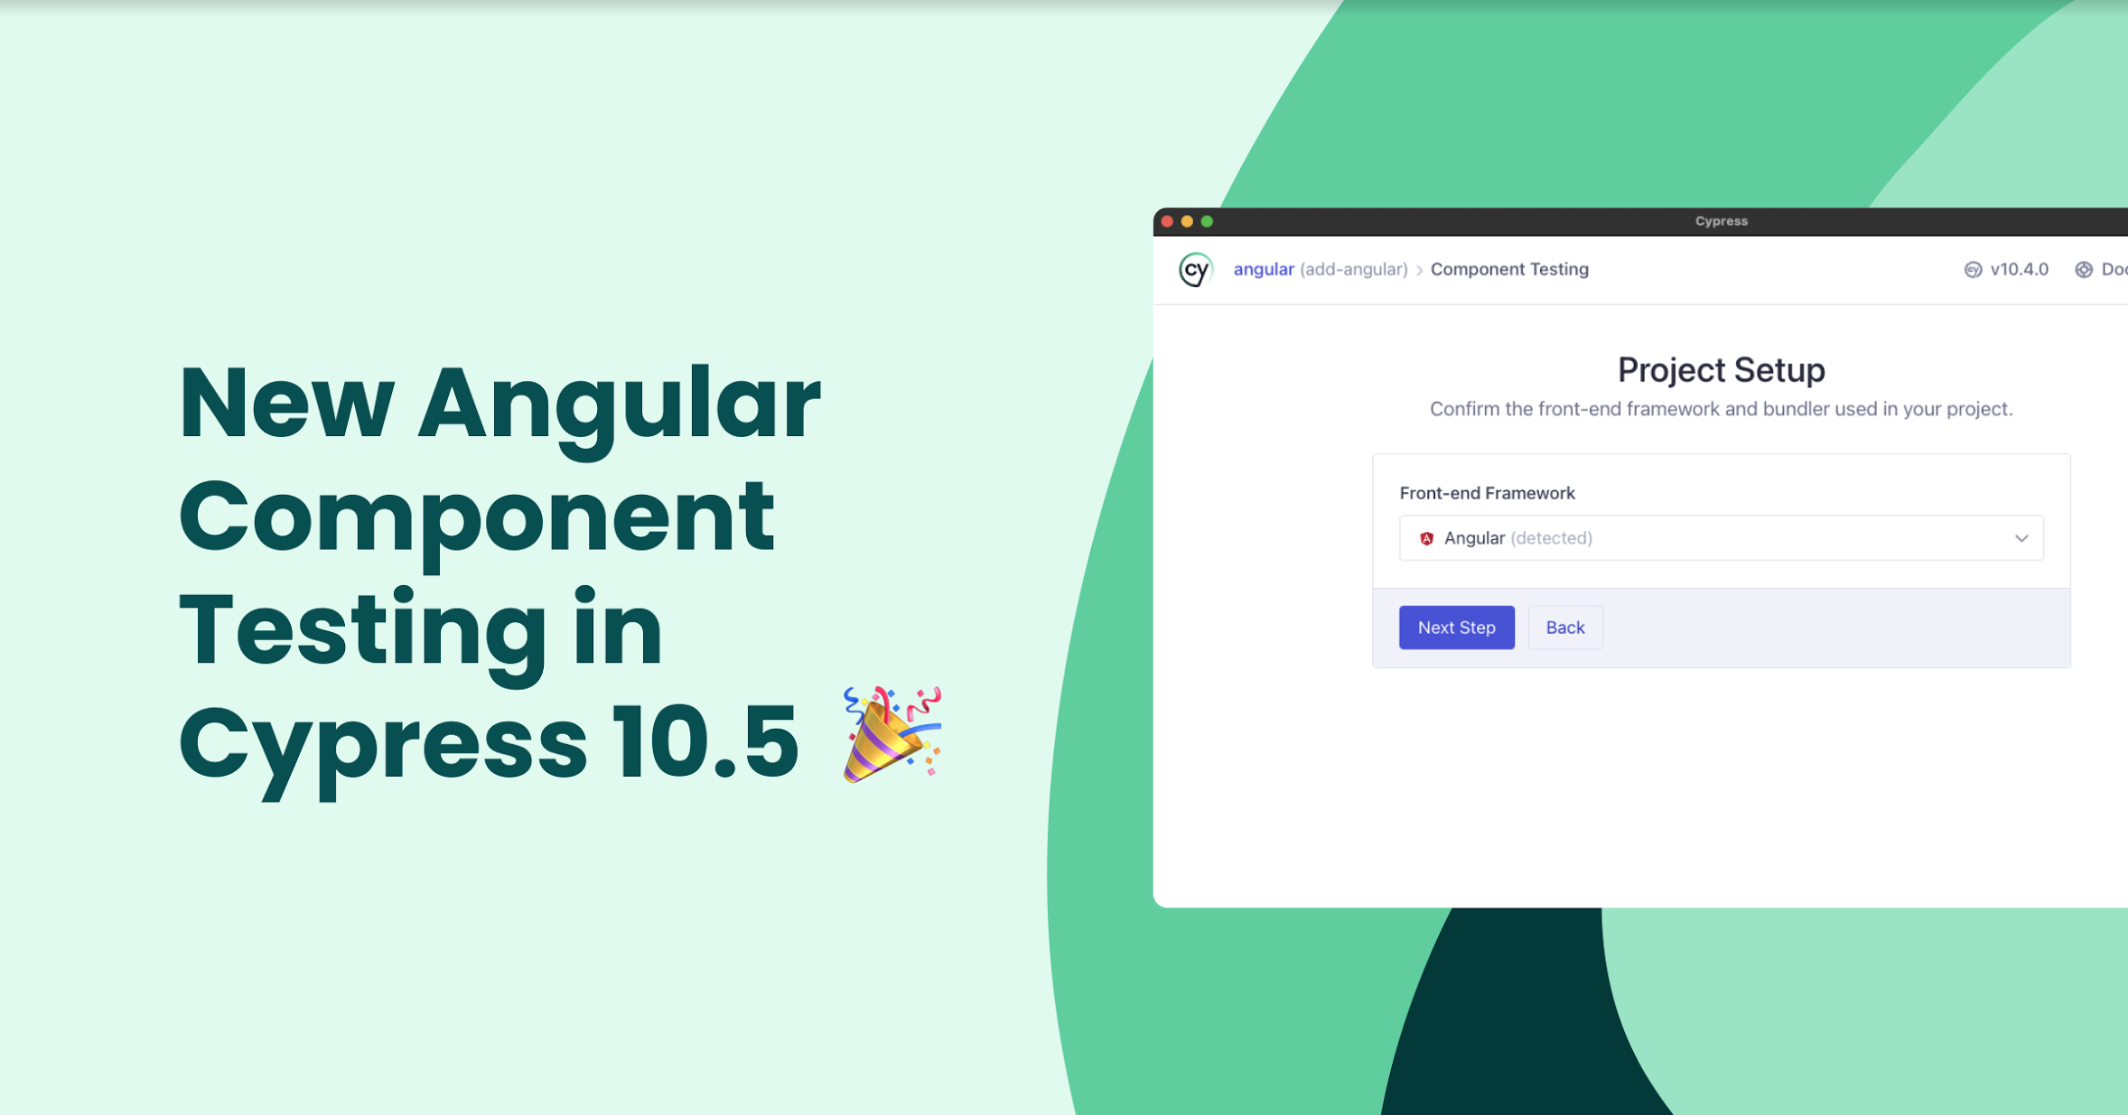
One of the things that makes Cypress Component Testing so powerful for Angular applications is that Angular follows a common convention that we can lean on to accurately configure your devServer. In fact, for most users it requires zero configuration at all! This is because we are able to read your angular.json file and determine everything we need to know to serve your component accurately and reliably. After updating to the most recent version of cypress via npm install cypress@latest, you can follow the Cypress Launchpad instructions that configures your angular application for component testing for you!
Sounds too easy to be true? Don’t worry, we prepared a quickstart guide to help walk you through setting up your project with Angular.
TL;DR – the configured devServer inside of the cypress.config.ts:
import { defineConfig } from 'cypress'

export default defineConfig({
  ...,
  component: {
    devServer: {
	  framework: 'angular',
	  bundler: 'webpack'
	},
    specPattern: 'src/**/*.cy.ts'
  }
})
Angular Mount
The second component (no pun intended) for getting started with Angular Component Testing in Cypress is a @cypress/angular mount function to mount your Angular component to the DOM. Thankfully the same Cypress Launchpad steps also handle the configuration of your mount function.
import { mount } from 'cypress/angular'

Cypress.Commands.add('mount', mount)
See the finished cypress/support/component.ts. This allows you to use cy.mount() in any component test without having to import {mount} from 'cypress/angular' in every spec file.
An important thing to note about the angular mount function is that it wraps around Angular’s own TestBed used for testing. This means you get to use the same ergonomically Angular nomenclature that you already use when testing. Let’s take a look at the @cypress/angular mount function’s API.
**The mount function takes 2 properties: the component you want to mount and a configuration used to configure the TestBed (amongst other things). Let’s first take a look at the first property of component.
Component is the class name (ie: ButtonComponent) or the template string itself (i.e.: <app-button></app-button>).
MountConfig actually extends the TestModuleMetadata used to configure your current angular tests. That means you declare, provide and import the same way you do in your Angular tests today!
const config: MountConfig<CardComponent> = {
  declarations: [IconComponent, ButtonComponent, ...],
  providers: [MyService, ...],
  imports: [SharedModule, ...],
  componentProperties: {
	// you can even access your components public properties and methods here
	// ie: @Input(), @Output(), etc
  }
}
Before & After
Ultimately your components will use the same angular TestBed you already know and love, and also allow you to run them in a real browser so you can interact with the component the way a real user would. This means that mounting components actually gets much simpler using significantly less code!
Let’s look at the simplest component test with Angular using Karma vs: Cypress.
Karma
import { ComponentFixture, TestBed, waitForAsync } from '@angular/core/testing';

import { ButtonComponent } from './button.component';

describe('ButtonComponent', () => {
  let component: ButtonComponent;
  let fixture: ComponentFixture<ButtonComponent>;

  beforeEach(waitForAsync(() => {
    TestBed.configureTestingModule({declarations: [ButtonComponent]}).compileComponents();
  }));

  beforeEach(() => {
    fixture = TestBed.createComponent(ButtonComponent);
    component = fixture.componentInstance;
    fixture.detectChanges();
  });

  it('should create', () => {
    expect(component).toBeDefined();
  });
});
Cypress
import { ButtonComponent } from './button.component'

describe('ButtonComponent', () => {
  it('can mount', () => {
	cy.mount(ButtonComponent)
  }
}
Other Features in 10.5
Create Specs from Components, starting with Vue
In this release, we also improved the set up process for Component Testing by enabling you to render components without having to manually write the mount command or test blocks. Instead, you can create a spec file that imports and mounts a given component in Cypress via the UI, getting rid of some of the boilerplate code you have to write.

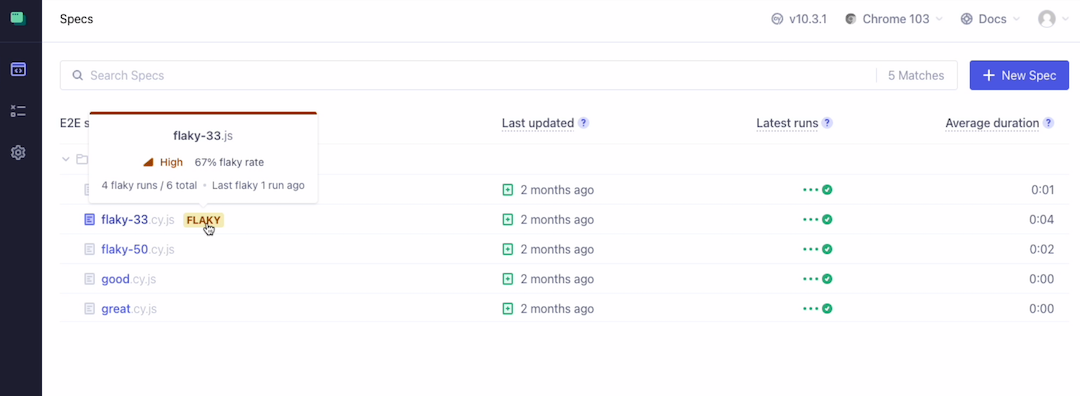
Flake Annotation within Spec Explorer
If you use the Cypress Dashboard cloud service to derive insights to measure and optimize your development and testing process, you can now easily access test flake data without leaving your local development workflow. You’ll now see a flaky badge in Spec Explorer, indicating which specs had flaky tests that may require your attention.
Wrapping Up
For a complete list of updates in 10.5.0, please review our changelog. If this feature is helpful, or if you have other ideas or feedback, let us know on Github.
Want to learn more about Angular Component Testing? Check out our All About Angular with Cypress webinar. Our own Ely Lucas and myself will be demoing Component Testing in Angular, showing you how to migrate from Protractor to Cypress, and how to use the Cypress Schematic.
You can also catch our experts at Ng Conf, a 3-day immersion into everything Angular in Salt Lake City, Utah. We’ll see you there!
Not using the Cypress Dashboard yet?
The Cypress Dashboard adds a layer of timely, simple, and powerful insights to all your test runs in a single, easy-to-use interface. Test and debug faster with the Cypress Dashboard. Get started for free.